I had a Birthday Stamp a Stack this weekend and this is one of the cards they made. I had some left over, so decided to do some different sayings.
LOVE that I can make the dog different types of dogs! The Wilderness Awaits #139365
Thanks for stopping by!
Email me at robynscherzer@hotmail.com if you have any questions!
Showing posts with label cards. Show all posts
Wednesday, January 27, 2016
Friday, April 24, 2015
Goodbye Stamp a Stack-Stampin' Up! Four Frames and Four You
So much going on!! Retirement list, lost 25 stamps, how many did you lose?
To say goodbye, I'll be doing a Goodbye Stamp a Stack on May 2 at 10am.
Come and make 12 cards featuring 4 stamp sets that well be saying good-bye to! Well make 4 designs 3 each from Thank You to Thinking About you. Please RSVP with registration fee by April 27, 2015. Here's a sneak peek of one of the cards will be doing, using Four Frames, Four You and Sweet Taffy DSP.
Thanks for stopping by! Email me at robynscherzer@hotmail.com if you have any questions!
To say goodbye, I'll be doing a Goodbye Stamp a Stack on May 2 at 10am.
Come and make 12 cards featuring 4 stamp sets that well be saying good-bye to! Well make 4 designs 3 each from Thank You to Thinking About you. Please RSVP with registration fee by April 27, 2015. Here's a sneak peek of one of the cards will be doing, using Four Frames, Four You and Sweet Taffy DSP.
Thanks for stopping by! Email me at robynscherzer@hotmail.com if you have any questions!
Tuesday, September 23, 2014
Stampin' Up! All Bloom Designer Series Paper
We made this super easy angle card at my last club.
All you do is cut your paper at an angle. Set the bottom piece aside and slide the top piece over anywhere from a 1/2" to 3/4" depending on your saying. Keeping the edge you want cut following your straight line on your cutter.
#133703 All Bloom Designer Series Stack is the paper. #130538 Four You stamp set. #131178 Strawberry Slush ink and CANDY DOTS!!! I love them for embellishments!
Now go make your own angle card!
Thanks for stopping by! Email me at robynscherzer@hotmail.com if you have any questions!
All you do is cut your paper at an angle. Set the bottom piece aside and slide the top piece over anywhere from a 1/2" to 3/4" depending on your saying. Keeping the edge you want cut following your straight line on your cutter.
#133703 All Bloom Designer Series Stack is the paper. #130538 Four You stamp set. #131178 Strawberry Slush ink and CANDY DOTS!!! I love them for embellishments!
Now go make your own angle card!
Thanks for stopping by! Email me at robynscherzer@hotmail.com if you have any questions!
Sunday, June 1, 2014
Stampin' Up! Work of Art
I'm really loving the watercolor look lately!
So here's a sneak peek of one of the great new stamp sets in the Catalog going live June 2~can't wait!!! Work of Art. I cased this right from the catty but I added the rhinestone using the Blendabilities to color it. LOVE LOVE LOVE IT!!
Thanks for stopping by! Email me at robynscherzer@hotmail.com if you have any questions!
So here's a sneak peek of one of the great new stamp sets in the Catalog going live June 2~can't wait!!! Work of Art. I cased this right from the catty but I added the rhinestone using the Blendabilities to color it. LOVE LOVE LOVE IT!!
Thanks for stopping by! Email me at robynscherzer@hotmail.com if you have any questions!
Tuesday, May 27, 2014
Stampin' Up! Sea Street
So this is a total CASE of a card from Stampin' Up! I just added the crab. You've got to admit, that crab is stinkin' cute!!
This card uses the new stamp set Sea Street and the new DSP Maritime available June 2.
If you come by my 9th Annual Customer Appreciation Luau on Thursday the 29th from 6-9, this is just one of the fun things we'll be doing! Wednesday is the last day to RSVP on my website at www.robynscherzer.stampinup.net under events.
Happy Stamping!
Thanks for stopping by! Email me at robynscherzer@hotmail.com if you have any questions!
This card uses the new stamp set Sea Street and the new DSP Maritime available June 2.
If you come by my 9th Annual Customer Appreciation Luau on Thursday the 29th from 6-9, this is just one of the fun things we'll be doing! Wednesday is the last day to RSVP on my website at www.robynscherzer.stampinup.net under events.
Happy Stamping!
Thanks for stopping by! Email me at robynscherzer@hotmail.com if you have any questions!
Monday, March 31, 2014
Stampin' Up! Gift Bow Die and Yippee Skippee
Since Disney's Frozen has come out on DVD. The Scherzer household has been singing outloud, "Do you want to build a Snowman." OK well its been me singing it.... I love that movie!! Anyway my friend Carol made an Olaf and it was so cute, I had to come home and make one myself!
I really wish I had a punch that said "I love warm hugs" though I think I found the perfect saying. Its from the stamp set, Yippee Skippee #131344. When I was trying to figure out what stamp to use, I asked Sage, what other things Olaf had said. Her answer, "I don't have a skull or bones". LOL, yes I have a stamp that says that! Too funny.
Supplies used: for his head Big Shot Gift Bow Die #129977, 1 3/4" circle punch for his middle #119850, 2 1/2" circle punch for his bottom #120906. I used the Extra Large Oval for his mouth #119859 and I used the Large Oval punch #119855 for his nose, but I trimmed it down with my paper snips. I kept one of the tabs from the Gift bow that I trimmed off as his tooth.
His feet are the small oval punch #120908 and I used the medium size circle from the owl punch #118074 for his eyes. I literally hand cut his arms out of Soft Suede cardstock and his buttons are the 1/2" circle. And I did hand cut his nose, the only part of him, I wasn't happy about....but over all, I think he's stinking cute!
Thanks for stopping by! Email me at robynscherzer@hotmail.com if you have any questions!
I really wish I had a punch that said "I love warm hugs" though I think I found the perfect saying. Its from the stamp set, Yippee Skippee #131344. When I was trying to figure out what stamp to use, I asked Sage, what other things Olaf had said. Her answer, "I don't have a skull or bones". LOL, yes I have a stamp that says that! Too funny.
Supplies used: for his head Big Shot Gift Bow Die #129977, 1 3/4" circle punch for his middle #119850, 2 1/2" circle punch for his bottom #120906. I used the Extra Large Oval for his mouth #119859 and I used the Large Oval punch #119855 for his nose, but I trimmed it down with my paper snips. I kept one of the tabs from the Gift bow that I trimmed off as his tooth.
His feet are the small oval punch #120908 and I used the medium size circle from the owl punch #118074 for his eyes. I literally hand cut his arms out of Soft Suede cardstock and his buttons are the 1/2" circle. And I did hand cut his nose, the only part of him, I wasn't happy about....but over all, I think he's stinking cute!
Thanks for stopping by! Email me at robynscherzer@hotmail.com if you have any questions!
Monday, March 24, 2014
Stampin' Up! Hello Lovely
Don't forget Saturday, March 29 from 9am-10am, is this month's Coffee, cupcake and a card. Just finished designing the card we'll be making. Isn't it stinkin' cute??!!! Remember this will be your last chance to take advantage of Sale-a-Bration. So come on by and bring a friend! Just make sure you RSVP so I have enough supplies for everyone! This free event is held at my house in Elkhorn, Wisconsin. If you are unable to attend and place a $25 order at www.robynscherzer.stampinup.com between now and March 29, 2014, I'll mail you a completed card for a thank you for supporting my business! Happy Stamping!
Thanks for stopping by! Email me at robynscherzer@hotmail.com if you have any questions!
Tuesday, March 18, 2014
Stampin' Up! From My Heart
I'm sure you've noticed how popular these cards have become. So I decided to make one at our clubs last month.
Supplies used: Envelope Punch Board #133774, From My Heart Stamp Set#126557, Labels Collection Framelits #125598, Crisp Cantaloupe Ruffled Ribbon #133021, Venetian Romance DSP#130144.
Now go make your own version! All supplies can be purchased at www.robynscherzer.stampinup.net.
Thanks for stopping by! Email me at robynscherzer@hotmail.com if you have any questions!
Supplies used: Envelope Punch Board #133774, From My Heart Stamp Set#126557, Labels Collection Framelits #125598, Crisp Cantaloupe Ruffled Ribbon #133021, Venetian Romance DSP#130144.
Now go make your own version! All supplies can be purchased at www.robynscherzer.stampinup.net.
Thanks for stopping by! Email me at robynscherzer@hotmail.com if you have any questions!
Sunday, March 16, 2014
Stampin' Up! Four You
I give my club gals a challenge every month. They are not required to do it but if they do, I give them a small token. Dimensionals, glue sticks, you know they might be able to use in their craftings.
These 3 cards were made last month by my "Church Ladies" club. Can you see the likeness in the layout?
The above card was made by Lesley Blum. She used the beautiful FREE Designer Series Paper, Sweet Sorbet from Sale-a-Bration. And the Stamp set Four You. I love how she tied all the paper together.
My mind is a total blank on who made this card!! I'm so sorry. Shout out if it was you! I need to write your names on the back! I think this is so pretty for a wedding card. I know its hard to see in the picture but that is a brushed silver cardstock not grey on the back. Beautiful!
Sheri Belanus made the above card. I love the whimsicalness (is that a word) of it. How she matched the background paper with the punch she used. So stinkin' cute!
Good job ladies!
Thanks for stopping by! Email me at robynscherzer@hotmail.com if you have any questions!
These 3 cards were made last month by my "Church Ladies" club. Can you see the likeness in the layout?
The above card was made by Lesley Blum. She used the beautiful FREE Designer Series Paper, Sweet Sorbet from Sale-a-Bration. And the Stamp set Four You. I love how she tied all the paper together.
My mind is a total blank on who made this card!! I'm so sorry. Shout out if it was you! I need to write your names on the back! I think this is so pretty for a wedding card. I know its hard to see in the picture but that is a brushed silver cardstock not grey on the back. Beautiful!
Sheri Belanus made the above card. I love the whimsicalness (is that a word) of it. How she matched the background paper with the punch she used. So stinkin' cute!
Good job ladies!
Thanks for stopping by! Email me at robynscherzer@hotmail.com if you have any questions!
Wednesday, March 12, 2014
Stampin' Up! Perfect Pennants
Just a quick post. Wanted to share one of the cards we made in club last month. I TOTALLY cased the idea off of Splitcoast, wrote her name down and its now lost in the sea of cardstock in my craft room! So if this was your original card, please shout out!
We used the new fringe scissors along with the FREE Designer Series Paper Sweet Sorbet. Card base is Crumb Cake, and of course the Bitty Butterfly punch.
Don't forget this week's specials! Sale-a-Bration is still going on so make sure you combine them to earn the free! Just got to www.robynscherzer.stampinup.net and shop now.
Thanks for stopping by! Email me at robynscherzer@hotmail.com if you have any questions!
We used the new fringe scissors along with the FREE Designer Series Paper Sweet Sorbet. Card base is Crumb Cake, and of course the Bitty Butterfly punch.
Don't forget this week's specials! Sale-a-Bration is still going on so make sure you combine them to earn the free! Just got to www.robynscherzer.stampinup.net and shop now.
Thanks for stopping by! Email me at robynscherzer@hotmail.com if you have any questions!
Saturday, March 8, 2014
Stampin' Up! Happy Day
So I had promised to post all the cards we did at my Birthday Buffet and time just got away from me!
Here's another one using the rock and roll technique. Rock and roll is an oldie but goodie. You just ink you stamp in a lighter color and while still inked your "roll" the edges in another color. Giving it a two tone effect.
Supplies used Crisp Cantalope, Soft Suede cardstock and ink. Along with the stamp sets Happy Day and Teeny Tiny Wishes.
All supplies can be purchased at www.robynscherzer.stampinup.net.
Thanks for stopping by! Email me at robynscherzer@hotmail.com if you have any questions!
Here's another one using the rock and roll technique. Rock and roll is an oldie but goodie. You just ink you stamp in a lighter color and while still inked your "roll" the edges in another color. Giving it a two tone effect.
Supplies used Crisp Cantalope, Soft Suede cardstock and ink. Along with the stamp sets Happy Day and Teeny Tiny Wishes.
All supplies can be purchased at www.robynscherzer.stampinup.net.
Thanks for stopping by! Email me at robynscherzer@hotmail.com if you have any questions!
Thursday, February 13, 2014
Stampin' Up! Sketched Birthday
So this is my 2nd most favorite card that we did at my Birthday Buffet Class.
I just love love love the Smokey Slate and Melon Mambo combo!
Supplies used: Sketched Birthday #130426, 1 3/4" Scallop Circle Punch #119854, 1 1/4" Circle Punch# 11986, Brights Designer Series Paper Stack #130134, Whisper White Taffeta Ribbon #109070. And of course the embossing folder is the new Decorative Dots that you can earn FREE with your Sale-a-Bration order! So what are you waiting for? Get to making those birthday cards!
You can shop online at www.robynscherzer.stampinup.net.
Thanks for stopping by! Email me at robynscherzer@hotmail.com if you have any questions!
I just love love love the Smokey Slate and Melon Mambo combo!
Supplies used: Sketched Birthday #130426, 1 3/4" Scallop Circle Punch #119854, 1 1/4" Circle Punch# 11986, Brights Designer Series Paper Stack #130134, Whisper White Taffeta Ribbon #109070. And of course the embossing folder is the new Decorative Dots that you can earn FREE with your Sale-a-Bration order! So what are you waiting for? Get to making those birthday cards!
You can shop online at www.robynscherzer.stampinup.net.
Thanks for stopping by! Email me at robynscherzer@hotmail.com if you have any questions!
Tuesday, February 11, 2014
Stampin' Up! The Open Sea
I had my 2nd Annual Birthday Card Buffet this Saturday and it was a huge hit!
Six designs to choose from and you could make as many as your hearts desire for only $1 each after your registration fee.
Always looking for masculine cards and I CASED this one from Sara Hoogendoorn. I, of course put my own twist on it, but it turned out essentially the same.
This is now one of my favorite cards!
The only little trick I did was stamp off to get the gray a little lighter.
Basic Black Cardstock #121045, Basic Gray Cardstock #121044 and Whisper White Cardstock #100730. Whisper White Bakers Twine#124262, The Open Sea #123032 and Itty Bitty Banners#132022 along with the matching framelits #129267.
One of the gals needed some masculine Thank You cards so I made some of those too!!
So this one just one of our designs. I'll post the other others in the next days.
Now go make your own masculine card!
Thanks for stopping by! Email me at robynscherzer@hotmail.com if you have any questions!
Six designs to choose from and you could make as many as your hearts desire for only $1 each after your registration fee.
Always looking for masculine cards and I CASED this one from Sara Hoogendoorn. I, of course put my own twist on it, but it turned out essentially the same.
This is now one of my favorite cards!
The only little trick I did was stamp off to get the gray a little lighter.
Basic Black Cardstock #121045, Basic Gray Cardstock #121044 and Whisper White Cardstock #100730. Whisper White Bakers Twine#124262, The Open Sea #123032 and Itty Bitty Banners#132022 along with the matching framelits #129267.
One of the gals needed some masculine Thank You cards so I made some of those too!!
So this one just one of our designs. I'll post the other others in the next days.
Now go make your own masculine card!
Thanks for stopping by! Email me at robynscherzer@hotmail.com if you have any questions!
Sunday, February 2, 2014
Stampin' Up! Happy Watercolor
Once a month, on the last Saturday of every month, I have a coffee, cupcake and a card class.
This past Saturday, we made this fun card, that was totally inspired by Lyssa Griffin Zwolanek.
I made it a little different but its basically the same. Only difference is I showed the gals how to take your silver glitter paper and make it a different color. Just take a sponge dauber and ink pad and keep applying ink to the glitter paper until you get the desired intensity of color. Easy peasy!
The red streak was not part of the making, it fell over on an ink pad! :(
Stamp set used is Happy Watercolor #133191. I just followed the rainbow for choosing colors.
You know ROYGBIV.
Here's Lyssa's card:
Crystal Effects makes the hearts shiny. Cute Cute!!
Now don't forget to come to my next Coffee, Cupcake and a card!
Thanks for stopping by! Email me at robynscherzer@hotmail.com if you have any questions!
This past Saturday, we made this fun card, that was totally inspired by Lyssa Griffin Zwolanek.
I made it a little different but its basically the same. Only difference is I showed the gals how to take your silver glitter paper and make it a different color. Just take a sponge dauber and ink pad and keep applying ink to the glitter paper until you get the desired intensity of color. Easy peasy!
The red streak was not part of the making, it fell over on an ink pad! :(
Stamp set used is Happy Watercolor #133191. I just followed the rainbow for choosing colors.
You know ROYGBIV.
Here's Lyssa's card:
Crystal Effects makes the hearts shiny. Cute Cute!!
Now don't forget to come to my next Coffee, Cupcake and a card!
Thanks for stopping by! Email me at robynscherzer@hotmail.com if you have any questions!
Monday, January 27, 2014
Stampin' Up! See Ya Later Alligator!
Well Folks,
Sale-a-bration is right around the corner and I can't wait! It starts tomorrow,so keep in mind, for every $50 you spend before tax and shipping you get FREE!!!! Here's a sample of some of the FREE you can earn!
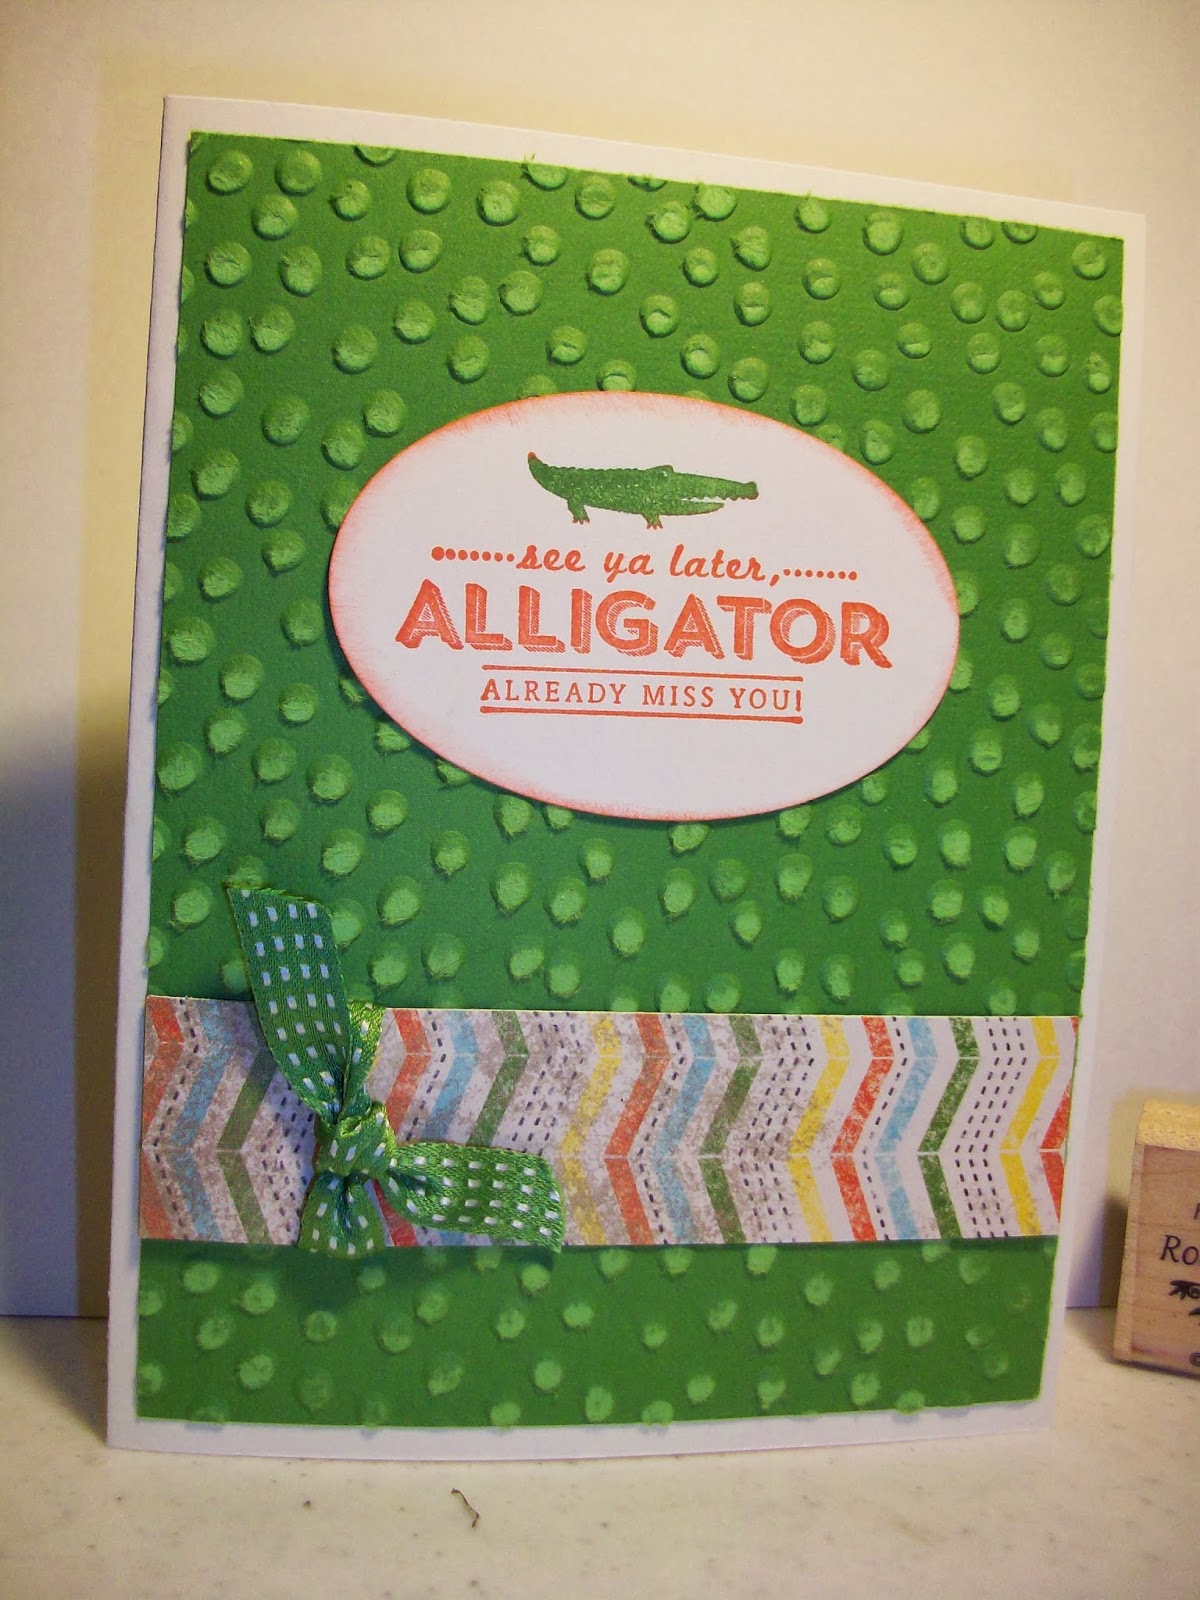
We made this fun card at my clubs this month. The stamp set is from Sale-a-Bration called, See Ya Later Alligator, which has 3 more fun sayings. And the embossing folder is also a freebie. LOVE IT!
We used Gumball Green Core'dinations #126836 (which I also saw whole packs of it on the Clearance Rack). We just took our sand block and sanded it a little. I thought it gave a fun look of "alligator skin". The DSP is Epic Day This and That #130814, and we used the Gumball Green Stitched Ribbon #126848
Now lets go Sale-a-brate!
Thanks for stopping by! Email me at robynscherzer@hotmail.com if you have any questions!
Sale-a-bration is right around the corner and I can't wait! It starts tomorrow,so keep in mind, for every $50 you spend before tax and shipping you get FREE!!!! Here's a sample of some of the FREE you can earn!
We made this fun card at my clubs this month. The stamp set is from Sale-a-Bration called, See Ya Later Alligator, which has 3 more fun sayings. And the embossing folder is also a freebie. LOVE IT!
We used Gumball Green Core'dinations #126836 (which I also saw whole packs of it on the Clearance Rack). We just took our sand block and sanded it a little. I thought it gave a fun look of "alligator skin". The DSP is Epic Day This and That #130814, and we used the Gumball Green Stitched Ribbon #126848
Now lets go Sale-a-brate!
Thanks for stopping by! Email me at robynscherzer@hotmail.com if you have any questions!
Saturday, January 4, 2014
Stampin' Up! Gorgeous Grunge
So I got this stamp set at convention in July and have not used it once! Can you believe that??
So since I've been on a stamp budget lately, I figured this is the perfect time to use it. And especially because I have my 2nd annual Birthday Buffet Bash coming up on January 18th at 1PM.
If your local to Elkhorn, Wisconsin, I'd love for you to come! For only $12 you make 4 birthday cards (your choice of designs from 6 different designs) and then for each additional card its only a $1! We'll be making masculine along with girlie girl cards! Please RSVP with your registration fee of $12 (non refundable) by January 15. Hope to see you there!
Thanks for stopping by! Email me at robynscherzer@hotmail.com if you have any questions!
So since I've been on a stamp budget lately, I figured this is the perfect time to use it. And especially because I have my 2nd annual Birthday Buffet Bash coming up on January 18th at 1PM.
If your local to Elkhorn, Wisconsin, I'd love for you to come! For only $12 you make 4 birthday cards (your choice of designs from 6 different designs) and then for each additional card its only a $1! We'll be making masculine along with girlie girl cards! Please RSVP with your registration fee of $12 (non refundable) by January 15. Hope to see you there!
Thanks for stopping by! Email me at robynscherzer@hotmail.com if you have any questions!
Tuesday, December 31, 2013
Stampin' Up! Christmas
I know tomorrow is New Year's Day 2014 (YIKES) but I was putting away our Christmas decorations (sniff sniff, I'm always sad to do that) and came across our Christmas cards people sent. And here's a few I wanted to share that were hand made. LOVE THEM ALL!!! Thank you ladies!!
This first one is from Lesley Blum.
Natalie Bauman made this cute little Santa!
Sheri Belanus made this one. Never would have thought to use soft suede for Christmas but I love it!
And Erin Sacharski made this one. I LOVE all the bling!
Remember we have a new set of Weekly deals starting today and of course the clearance rack has some wonderful deals!!! Please shop now at www.robynscherzer.stampinup.net.
Have a wonderful New Years!
Thanks for stopping by! Email me at robynscherzer@hotmail.com if you have any questions!
This first one is from Lesley Blum.
Natalie Bauman made this cute little Santa!
Sheri Belanus made this one. Never would have thought to use soft suede for Christmas but I love it!
And Erin Sacharski made this one. I LOVE all the bling!
Remember we have a new set of Weekly deals starting today and of course the clearance rack has some wonderful deals!!! Please shop now at www.robynscherzer.stampinup.net.
Have a wonderful New Years!
|
|
|
|
||||||||
|
|
|
|
|
|
Thanks for stopping by! Email me at robynscherzer@hotmail.com if you have any questions!
Saturday, November 23, 2013
Stampin' Up! Christmas Messages
Well our November is quickly coming to an end and our last club of the month met this week. Wanted to share this way cute card we made! I was inspired by a card I saw from Carrie Rhoades. I see these stars made ALL the time and thought they would be too difficult to attempt, but they are super easy!
Supplies used: Cherry Cobbler ink and cardstock, Old Olive cardstock, Christmas Messages stamp set #131793, and Season of Style DSP stack #132181.
Here's how to make your star. Create a template with what size star you want. Trace it onto your cardstock and cut out. Don't worry about it being perfect, once its folded you won't really notice it.
Using either your cutter with scoring blade or a ruler with stylus (like I did), you want to score lines from the point of the star to the "valley" directly across from it. I found it easier to rotate my star as I did it, so point straight up, score, turn to next point straight up. Etc, until you've done all 5 points.
Your score lines should look like this (I drew lines so you could see the score lines better for the picture). Notice how all the lines should intersect in the middle. Fold at all the score lines make sure you have a nice crease.
I found to make sure you have mountains and valley, you want to accordian fold the star.
You can only accordian fold 3 points at a time, so you'll have to turn it a few times including the last point in the next accordian fold.
And at the end you should have these.
I adhered each point down to my card with glue dots to help it keep its shape and keep it in place.
Super cute and super easy!
Now go make your own card!
Thanks for stopping by! Email me at robynscherzer@hotmail.com if you have any questions!
Supplies used: Cherry Cobbler ink and cardstock, Old Olive cardstock, Christmas Messages stamp set #131793, and Season of Style DSP stack #132181.
Here's how to make your star. Create a template with what size star you want. Trace it onto your cardstock and cut out. Don't worry about it being perfect, once its folded you won't really notice it.
Using either your cutter with scoring blade or a ruler with stylus (like I did), you want to score lines from the point of the star to the "valley" directly across from it. I found it easier to rotate my star as I did it, so point straight up, score, turn to next point straight up. Etc, until you've done all 5 points.
Your score lines should look like this (I drew lines so you could see the score lines better for the picture). Notice how all the lines should intersect in the middle. Fold at all the score lines make sure you have a nice crease.
I found to make sure you have mountains and valley, you want to accordian fold the star.
You can only accordian fold 3 points at a time, so you'll have to turn it a few times including the last point in the next accordian fold.
And at the end you should have these.
I adhered each point down to my card with glue dots to help it keep its shape and keep it in place.
Super cute and super easy!
Now go make your own card!
Thanks for stopping by! Email me at robynscherzer@hotmail.com if you have any questions!
Monday, November 18, 2013
Club Challenge
So this year, I decided to change it up a bit with my clubs. They always had to do swaps but I've switched it to swaps every other month and I give them a challenge to do (or not to do) the other month. If they do the challenge they get a little something something from me.
My church ladies club met on Friday and out of the 11 only 3 did it but I thought all 3 of them were outstanding!
This first one is from Naomi Zeinert.
This second one is from Lesley Blum. Since she just started, she didn't have the scallop circle punch yet....
And this third one is from Sheri Belanus.
Awesome job ladies!!!
Thanks for stopping by! Email me at robynscherzer@hotmail.com if you have any questions!
My church ladies club met on Friday and out of the 11 only 3 did it but I thought all 3 of them were outstanding!
This first one is from Naomi Zeinert.
This second one is from Lesley Blum. Since she just started, she didn't have the scallop circle punch yet....
And this third one is from Sheri Belanus.
Awesome job ladies!!!
Thanks for stopping by! Email me at robynscherzer@hotmail.com if you have any questions!
Friday, November 15, 2013
Stampin' Up! Greetings of the Season
Can you believe that Christmas is like 6 weeks away?? YIKES! Well, I don't know if you were aware but you can still get the awesome stamp set Greetings of the Season.
I wanted to try my hand at the sunburst design that has been going all over and its super easy!
So we made this card last month:
We used the awesome designer series mini stack Winter Frost #132183 out of the holiday mini.
Basically you just need a scrap panel to lay your strips on. So you pick the size of panel you want to build (this one is 3 3/4 " x 2 3/4"). Cut 4 DSP strips 1" x 4" and you cut each of those strips into triangles on your cutter. You know from one corner to the opposite corner, so it forms a triangle. Now you have 8 triangles. I used our awesome glue stick on the whole piece of scrap. And start from the middle and work you way out. You'll end up with a bunch of the DSP sticking over the edge of your scrap but you just trim it away. Easy peasy.
Funny thing is my club gals do swaps and a couple brought swaps of the same technique, pretty funny huh?
So here's a picture of one that Lesley Blum brought for her swaps.
Now go try this yourself!
Thanks for stopping by! Email me at robynscherzer@hotmail.com if you have any questions!
I wanted to try my hand at the sunburst design that has been going all over and its super easy!
So we made this card last month:
We used the awesome designer series mini stack Winter Frost #132183 out of the holiday mini.
Basically you just need a scrap panel to lay your strips on. So you pick the size of panel you want to build (this one is 3 3/4 " x 2 3/4"). Cut 4 DSP strips 1" x 4" and you cut each of those strips into triangles on your cutter. You know from one corner to the opposite corner, so it forms a triangle. Now you have 8 triangles. I used our awesome glue stick on the whole piece of scrap. And start from the middle and work you way out. You'll end up with a bunch of the DSP sticking over the edge of your scrap but you just trim it away. Easy peasy.
Funny thing is my club gals do swaps and a couple brought swaps of the same technique, pretty funny huh?
So here's a picture of one that Lesley Blum brought for her swaps.
Now go try this yourself!
Thanks for stopping by! Email me at robynscherzer@hotmail.com if you have any questions!
Subscribe to:
Posts (Atom)